
Adjust the course theme
How to adjust a course's theme in Studio: style, colours, cover page, lesson header, navigation, fonts, and when learners see the change.
Under Theme you decide how a course looks and behaves for learners: style, colours, cover page, lesson header, navigation, fonts and animations.
Before you start
- You have the right to edit the course (Hub task “Create courses”). Without it Studio does not open the page but takes you back to the course.
- The theme belongs to the draft. Learners see a change only once you publish. See “Publish a course”.
Adjust the theme
-
In the course sidebar, under Setup, click Theme. The course settings lead there too: in the Presentation section there is the button Open theme.
-
The page shows the settings and the Live preview. The header shows the save status: “Saving …”, “Saved” or “Unsaved”.
- The preview shows the Cover page or a Lesson. For the lesson you choose between Sample and This course, the first lesson of your course. If it is empty, it says “No blocks yet”.
- Five icons above the preview change the Preview size. Their tooltips are Desktop, Tablet portrait, Tablet landscape, Phone portrait and Phone landscape.
-
Under Style, choose one of the five styles: Clinical (default), Clear, Friendly, Editorial or Bold. A style coordinates fonts, colour, cover page, lesson header and navigation.
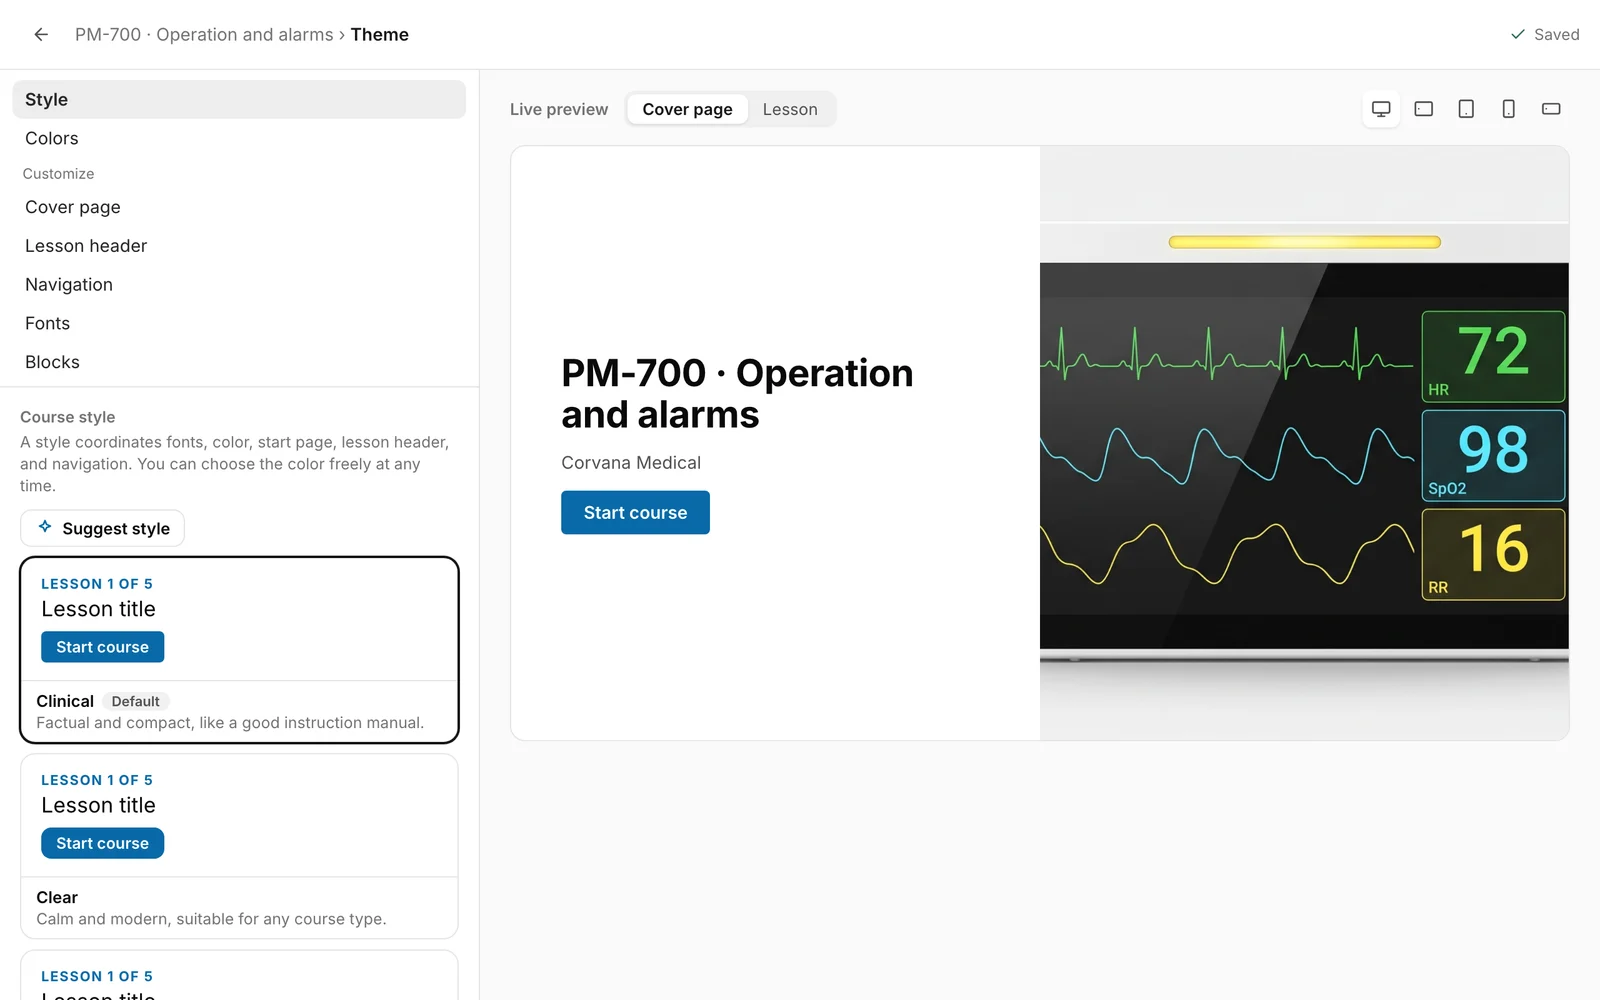
- If you switch the style, Studio sets fonts, the arrangement of the cover page, the lesson header and the look of the navigation to the values of the new style. The colour, images and the other switches stay.
- If you have changed one of these values, ”
customizations relative to the style” appears below the styles with the button Reset to style. It sets these values back to the style, not the colour. - Suggest style lets the AI choose a style, based on the title, the description and the lesson titles of the course. You see the suggestion with a short reason and take it with Apply. The suggestion uses the AI credit of the workspace (see “AI usage and credit”). If none is free, the AI does not answer or no suggestion is possible, it says “No suggestion is currently available.”
-
Choose the colour under Colors. You can pick Style color (the default), your workspace’s Brand color (the accent colour from “Organization, languages and branding”, only if the workspace has one), the Color from the cover image (only if the course has a cover image), colour presets, and Custom color with a colour picker. The colour is kept when you change the style. Under Text contrast you decide the text colour on accent buttons: Automatic (default, WCAG-based), Dark or Light.
-
Under Customize you set the rest:
- Cover page: Arrangement (eight layouts), Cover image, Logo, and the switch Show “Start/Continue” button. When it is on, learners start the course directly from the cover page.
- Lesson header: Hide lesson header, the style of the header (for example Light, Dark, Custom color or Image), Lesson header height (Small, Medium, Large), as well as Show lesson number and Author image. If the header is hidden, the other settings are locked.
- Navigation: Navigation type (Sidebar, Compact or Overlay), Style (light or dark), switches for Search and Video playback speed, and Progress indicator style. The tab Type also holds the switches Navigation, Restrict navigation and Learners confirm lessons themselves, explained under “What happens next”. The Previous/next lesson buttons with Button layout and Color scheme are in the tab Buttons.
- Fonts: a font pair; recommended ones are marked Recommended. If the course has a pair that is no longer available, Studio shows it under Previous fonts. The course keeps it until you choose another pair.
- Blocks: Entrance animations for blocks. Blocks without body text, such as images, cards and quizzes, fade in as learners scroll.
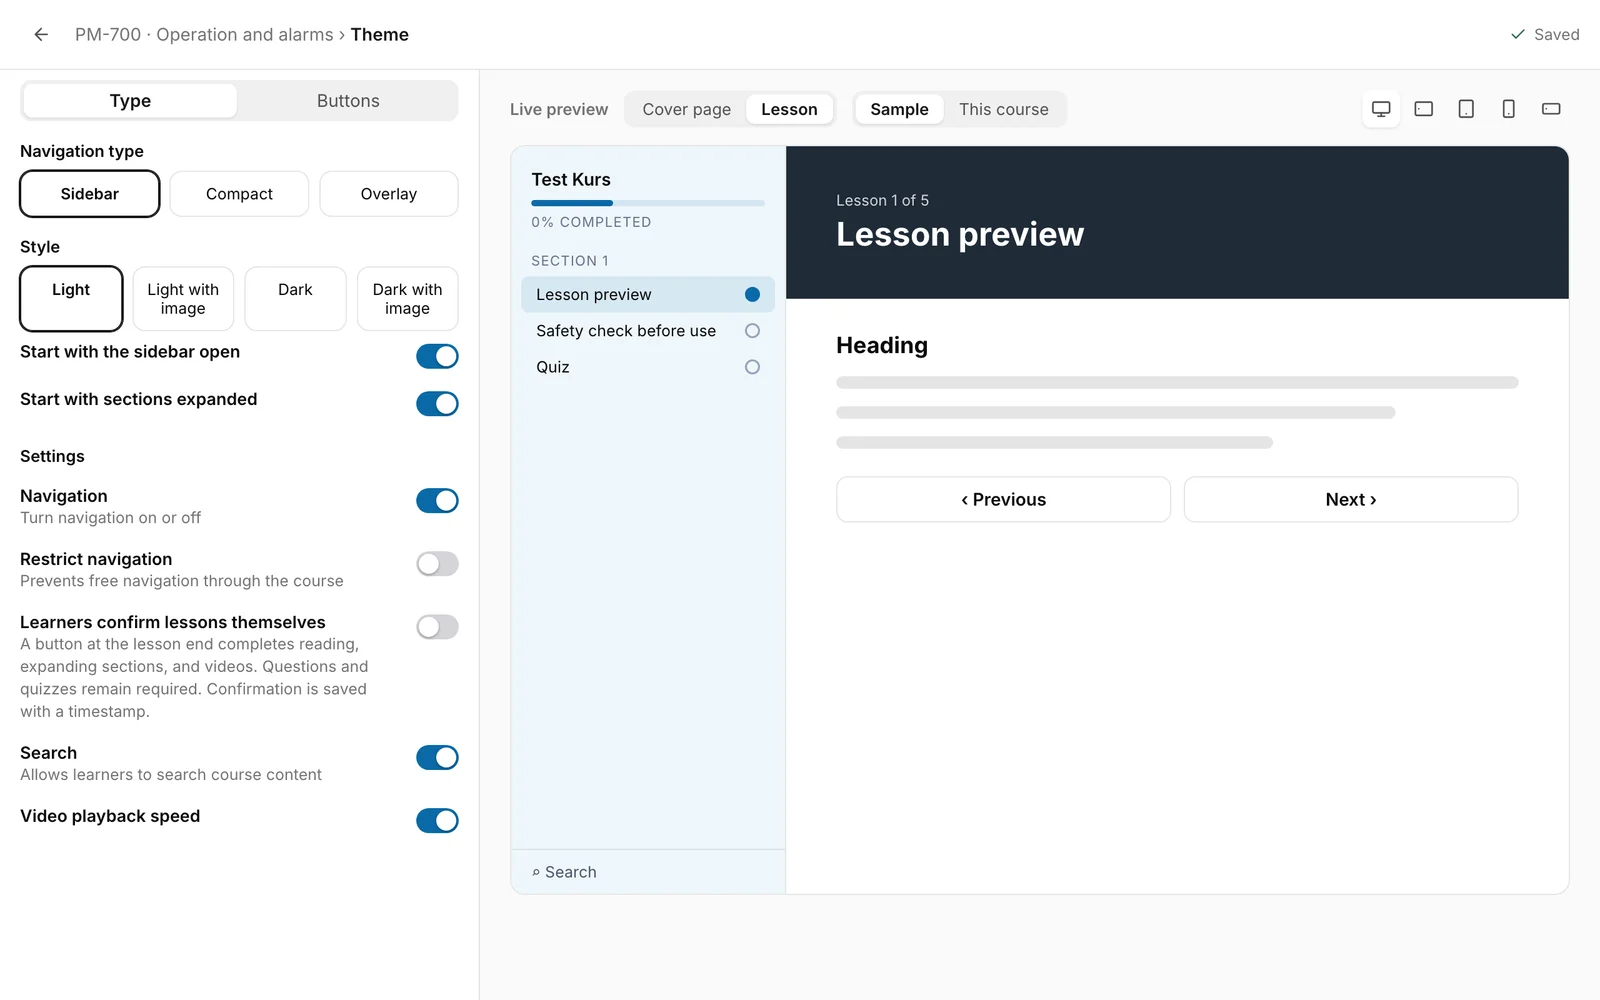
You know it worked when: “Saved” appears at the top right. Studio saves every change into the draft by itself shortly after you make it. There is no save button.
What happens next
- Learners see the new theme with the next publication. The settings belong to the published version. For a correction, the new theme also applies to attempts in progress. For a new version, only learners who start the new version see it. Attempts in progress stay on the old version and its old theme. See “Versions and corrections”.
- Most theme changes count as a correction for a course that has already been published. Three switches under Navigation change the learning path and need a new version: Navigation, Restrict navigation and Learners confirm lessons themselves. If you changed one of them, Fracto reports “Changed navigation or completion settings require a new version.” when you publish a correction.
- Navigation turns the navigation on or off. Restrict navigation locks a lesson until the previous one is done. Going back stays possible. With Learners confirm lessons themselves, a button at the lesson end completes reading, expanding sections and videos. Questions and quizzes remain required. The confirmation is saved with a timestamp.
- If you restore a saved version, this also resets the theme of the course to the state of that version. A backup does not change the theme. See “Restore an earlier version”.
If it does not work
| Message | What it means |
|---|---|
| Theme could not be saved. | Saving failed. Studio keeps your latest change. Click Try again. |
| Another person has changed the course. Reload before continuing. | Someone changed the draft. Reload with Load current version. Then you see the current state and can repeat your change. |
| Theme could not be loaded. | The settings could not be loaded. Reload the page. |
Checked on 6 November 2026 against the current Fracto release.