
Create a labeled graphic
How to create a labeled graphic in Studio: choose an image, place markers, and enter a title, text, image and audio for each marker.
A labeled graphic shows an image with markers. Learners click a marker and see a card with a title, text and, if you like, an image and audio. This suits, for example, the parts of a device.
Before you start
- You have the Create courses task in Hub.
- You have an image, ideally in the course’s media library or as a file to upload.
- Without its own background image, the graphic does not appear for learners. A new block only brings a placeholder image and two sample markers (“Item 1”, “Item 2” with dummy text). Replace everything.
How to create a labeled graphic
-
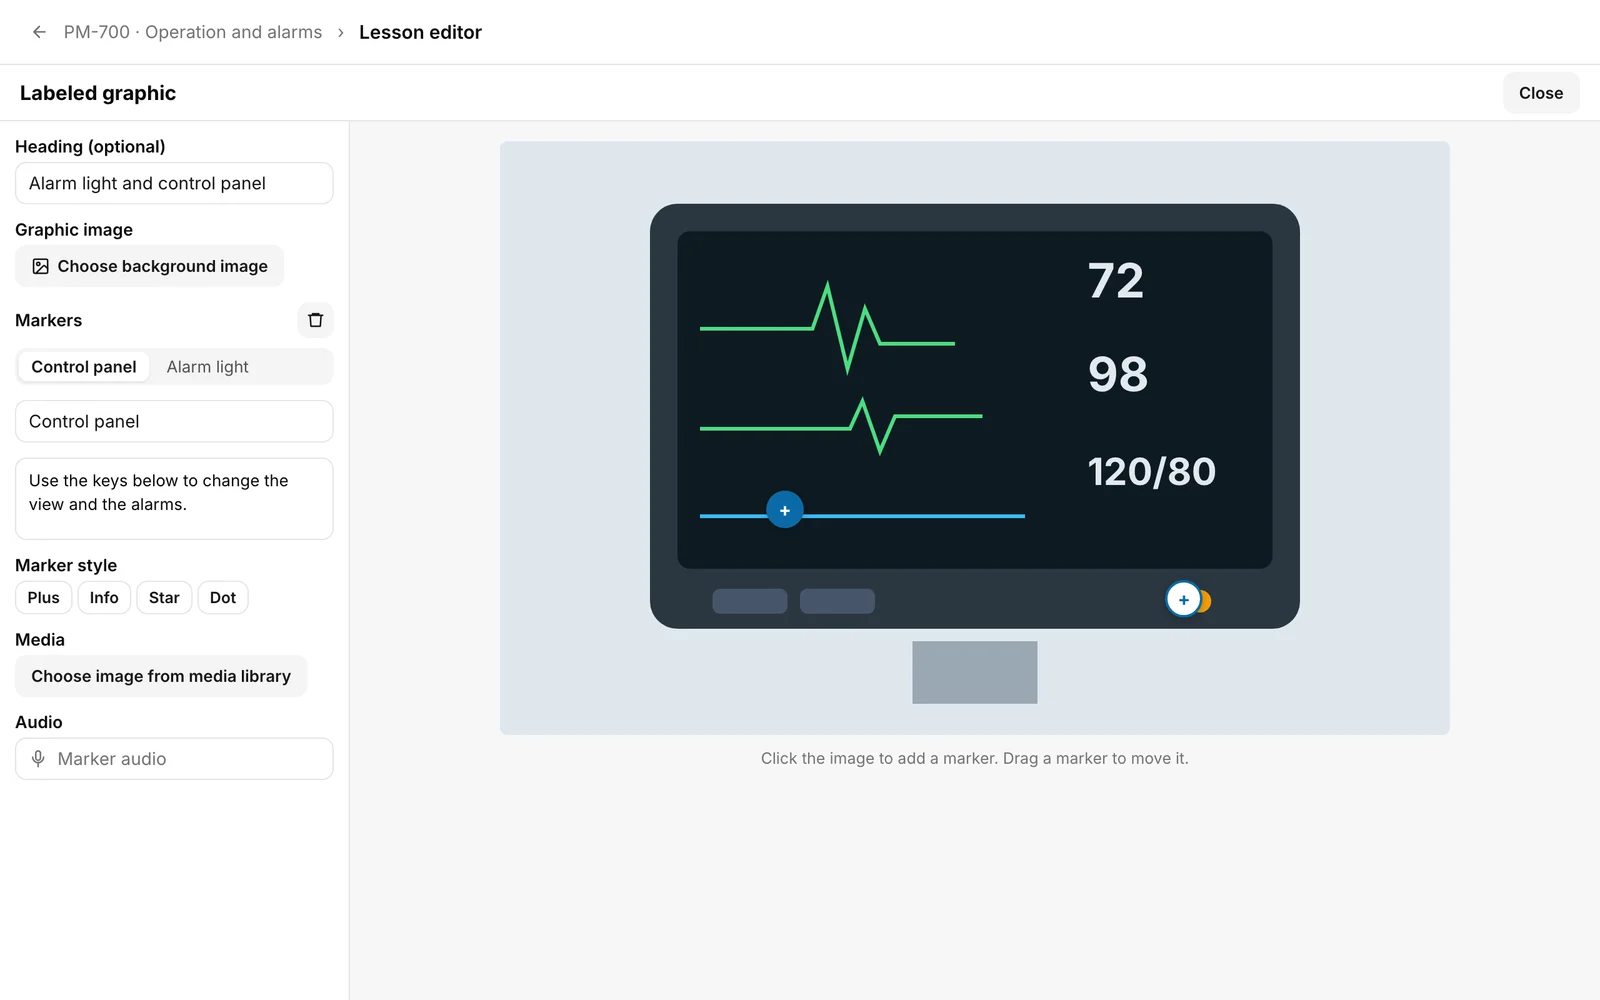
Open the lesson in the lesson editor and insert the Labeled graphic block from the block library in the Interactive category (see “All block types”). The Labeled graphic editor opens as a full-size window. Later you open it again by clicking the block in the lesson.
-
If you like, enter a Heading (optional). Learners see it above the graphic.
-
Under Graphic image, click Choose background image and choose the image in the media library. As long as no image of your own is chosen, it says “No background image selected. Without an image, the graphic does not appear in the Player.”
-
Click in the image where a marker should be. The new marker is selected right away. To move a marker, drag it or select it and press the arrow keys (1 % per press, 5 % with the Shift key). Under Markers you switch between the markers. The buttons carry the marker’s title, or “Entry 3” while it is missing. The trash icon next to Markers removes the selected marker.
-
For the selected marker, enter the Title. It is the heading of the card, so give every marker one. Write the Description below it.
-
Choose the Marker style: Plus, Info, Star or Dot. You see which style applies on the marker in the image, the buttons do not show it.
-
Under Media, choose an image for the card with Choose image from media library if you like. The trash icon on the image (Remove image) takes it out again. Under Audio you can add audio for the card.
-
Click Close.
You know it worked when: the block shows your image with the markers in the lesson, and the editor says Saved. Check the graphic in the course preview.
What learners see
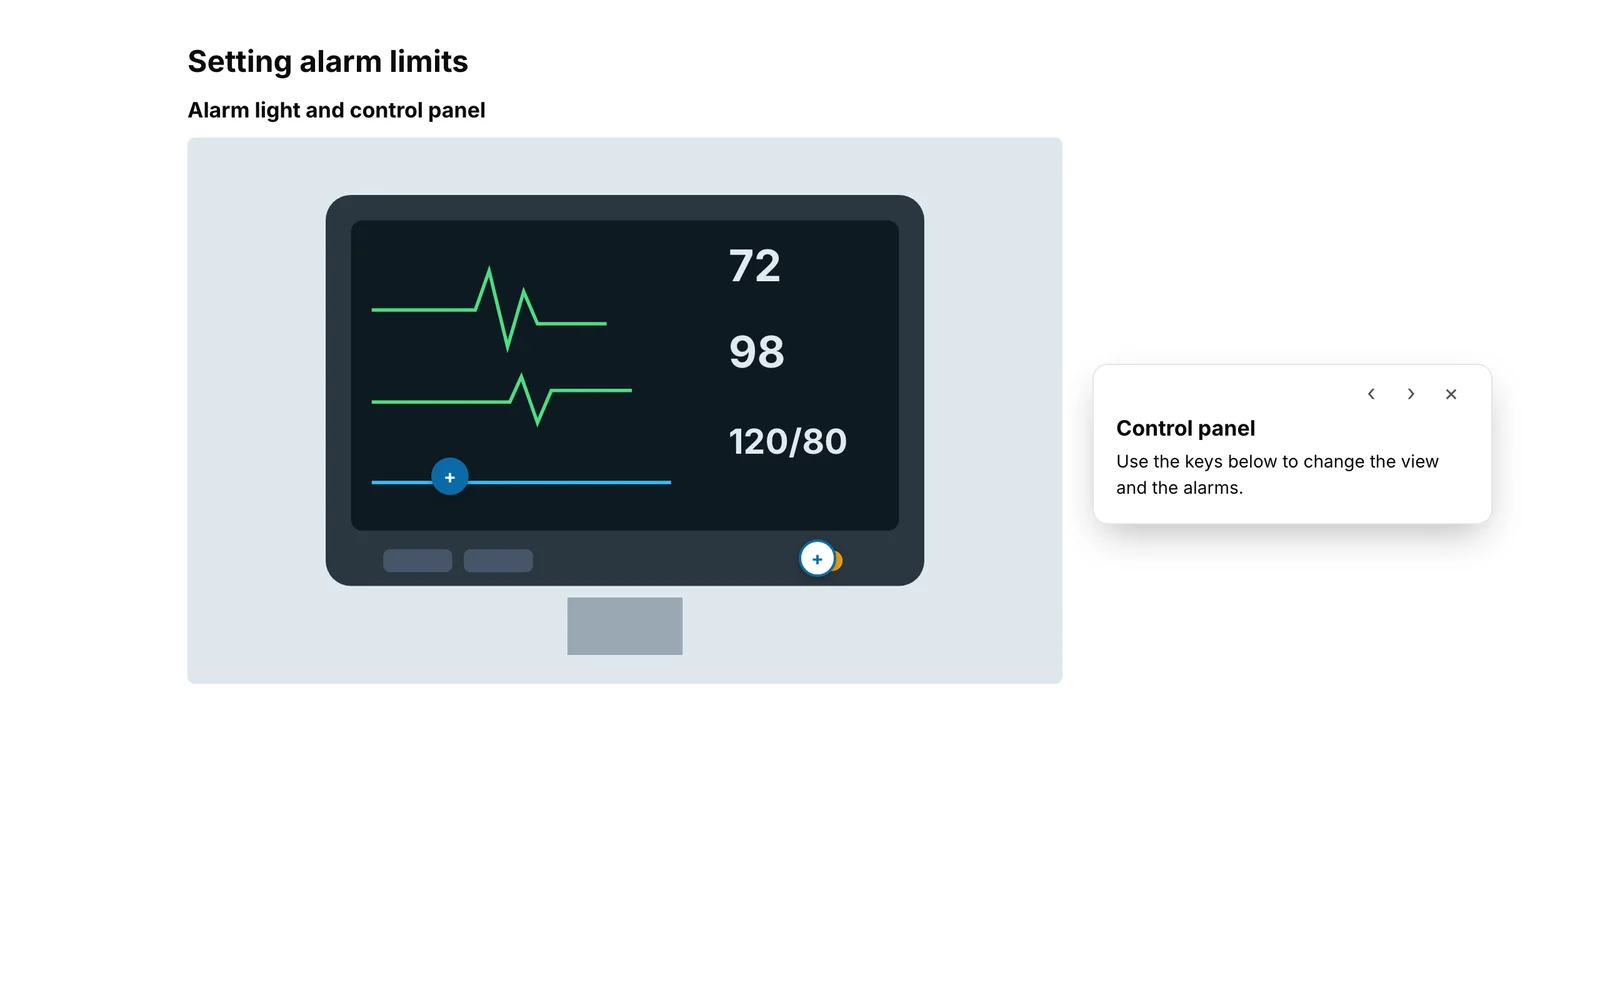
- The markers appear as soon as the image has loaded. A click on a marker opens the card with title, text, image and audio. On a wide screen it sits beside the image or the marker, on a narrow one (under 640 pixels) below it. It also sits below the image if it would cover the marker or more than 40 % of the image.
- If there is more than one marker, learners go to the previous or next one with the arrows on the card. After the last marker, the card jumps to the first. The cross closes the card, and so does a click outside it or a second click on the open marker.
- A lesson with a labeled graphic only counts as finished once learners have opened every marker once (see “Finish a lesson: what is still open”). A graphic without markers keeps nothing open.
- Learners only see the graphic once the course is published (see “Publish a course”).
If it does not work
These texts are notes, not error messages.
| Note | What it means |
|---|---|
| No background image selected. Without an image, the graphic does not appear in the Player. | Only the placeholder image is there. Choose an image of your own. |
| Click the image to add markers. | The graphic has no marker. Click into the image. |
| Demo image or missing image | This is how the publishing check reports a graphic without its own image. The graphic is then missing in the Player. You can still publish, but the check cannot be solved with Fix: choose an image. |
If a chosen image cannot be loaded, the editor shows the placeholder image again, and the graphic does not appear for learners. Then choose another image.
Checked on 6 November 2026 against the current Fracto release.