
Add a voice-over to a lesson
How to add spoken audio to a lesson in Studio: upload a file, record it yourself, or have an AI voice read a script.
A lesson gets audio through the Audio block. You upload the audio track, record it yourself, or have an AI voice speak it from a text.
Before you start
- You need the Hub task Create courses. It also covers media and AI features such as speech and script. Only its owner edits a private course.
- Speech and script use up the workspace’s AI credit. A voice preview costs only once per workspace, when it is created for the first time. Administrators see the balance in the Hub (see “AI usage and credit”).
- To record, your browser needs access to the microphone. It asks you for it.
How to add audio
-
In the Block library, under Multimedia, insert the Audio block. Inserting is described in “Edit a lesson with blocks”. Select the block and click Edit.
-
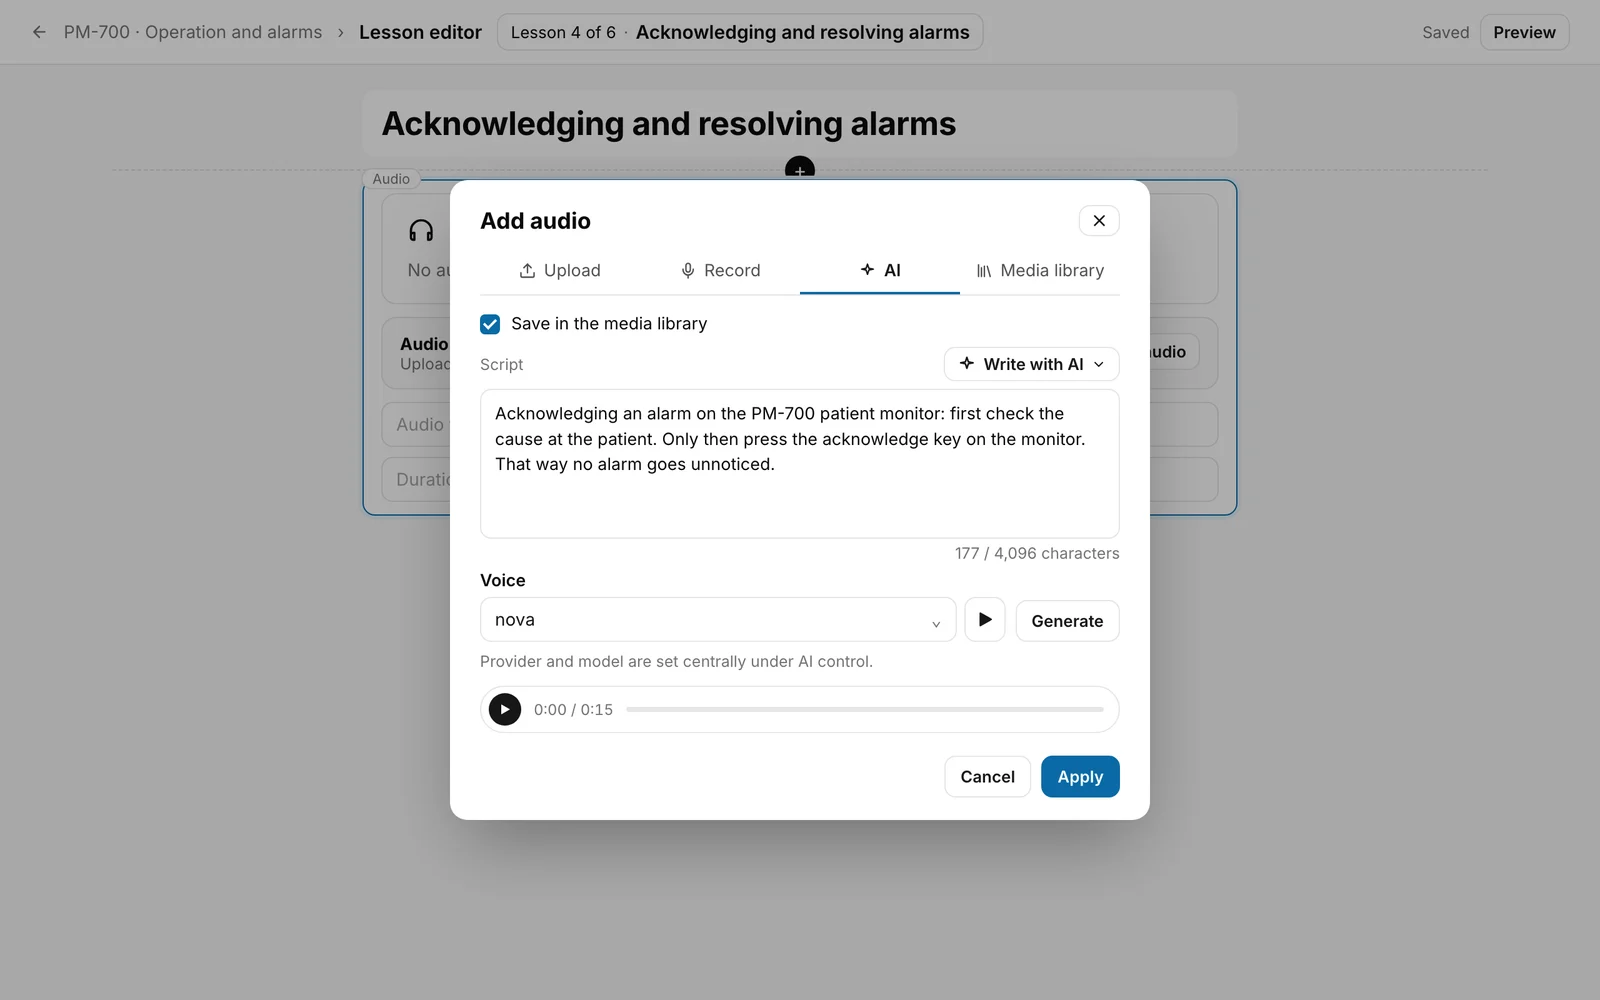
In the box Audio file, click Add audio. The window Add audio opens with the tabs Upload, Record, AI and Media library. The box Save in the media library is on by default. On the tab Record it is off, on the tab Media library the box does not exist.
-
Choose where the audio comes from:
- Upload: Click Choose audio file (for example MP3, WAV, M4A, OGG, WebM, AAC, FLAC or Opus), listen to the preview and click Save.
- Record: Click Start recording and speak. Stop ends the recording, after 5 minutes it ends by itself. Listen to it. Discard deletes it, Save keeps it.
- Media library: Choose an audio file that is already in the media library.
- AI: Read on at step 4.
-
In the AI tab you write the text to be spoken into the field Script (at most 4,096 characters, a counter shows where you are). Or you have a script written for you: Write with AI opens a menu.
- From this lesson writes a script from the lesson’s texts. The saved state is used, and at most the first 12,000 characters. So the lesson needs text.
- Your own input text… opens a field “What should the script talk about?”. Then click Generate script.
- If there is already text in the field, Fracto first asks “Overwrite the existing script text?”. Stop cancels the writing.
- The script is a suggestion. It is running text addressed directly to the learner, without lists or headings. Read it and edit it before you go on.
-
Under Voice choose a voice: alloy, echo, fable, onyx, nova (preset) or shimmer. Preview voice plays a sample. Then click Generate. Fracto creates the audio and shows it for listening.
-
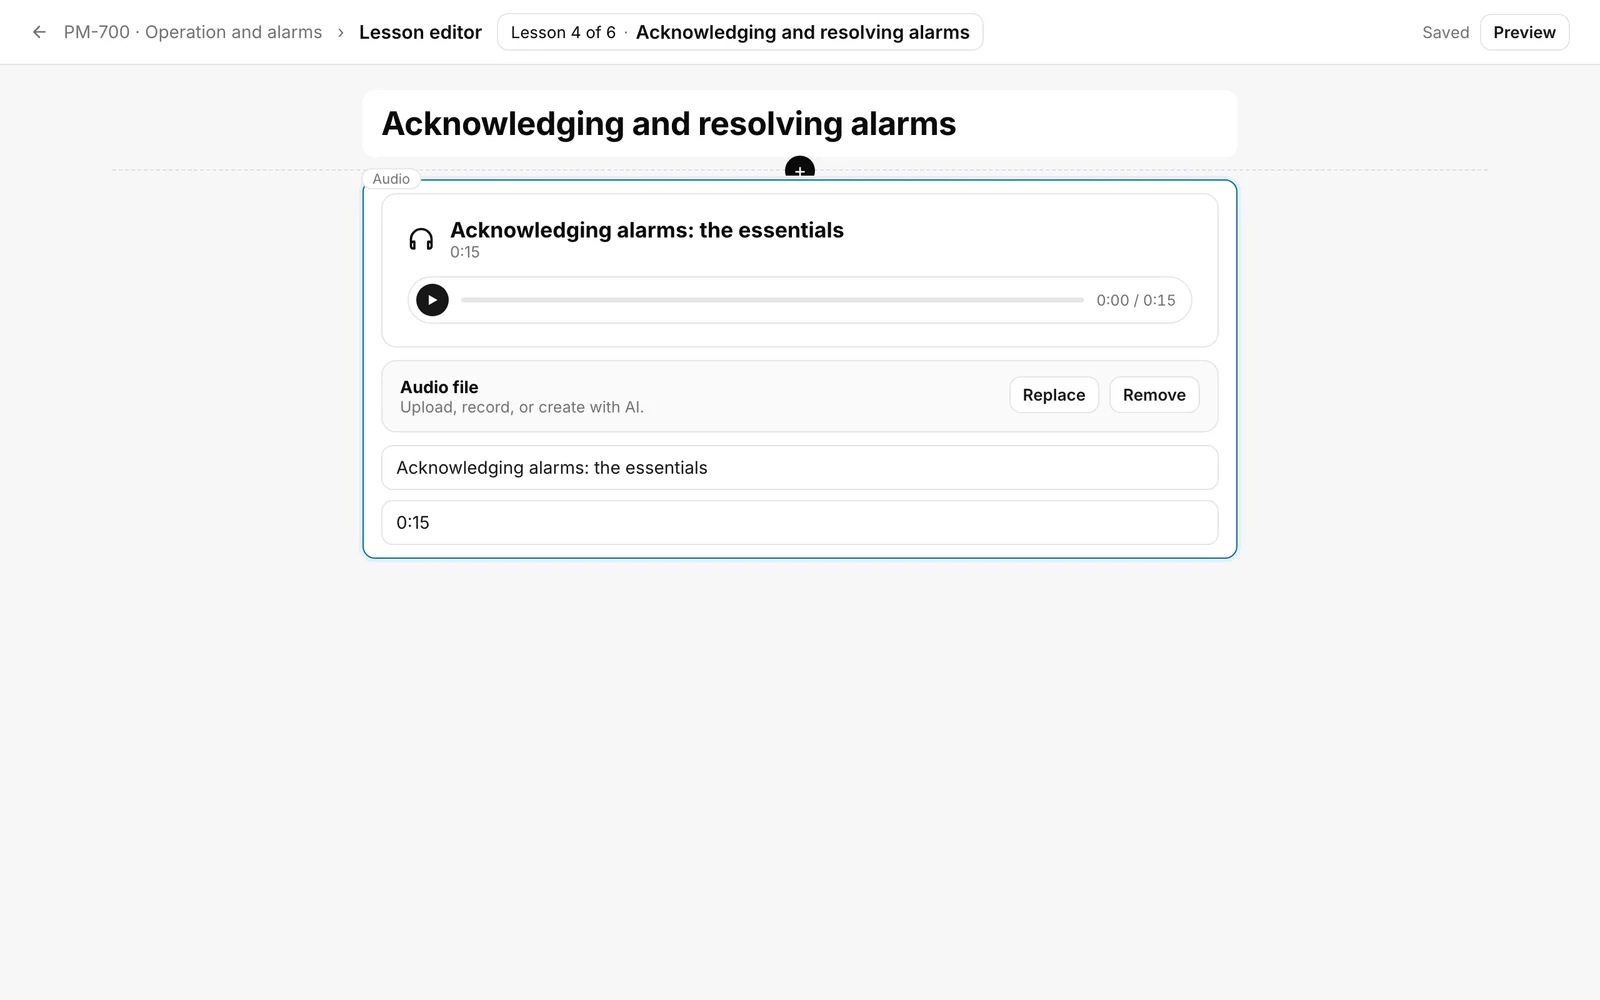
Click Apply. The window closes and the audio is in the block. Enter an Audio title. Under Duration, e.g. 0:18 you enter the duration yourself, Fracto does not calculate it. With Replace you swap the file, with Remove you take it out.
You know it worked when a player with your title appears in the block and the editor shows Saved at the top.
What happens afterwards
- The file belongs to the course. Learners hear it once the course is published (see “Publish a course”).
- A few other blocks also have an audio field, for example Coach check-in and Narration in the category Audio guidance. The same choice with the same four tabs applies there. A new audio file in such a block needs a new version in a published course.
- When a course is translated, Fracto translates the title and the duration text. The audio file stays the same in all languages. Only videos have a separate file for each language.
- If you insert an Audio block anew into a course that was published before, that needs a new version. If you only swap the file, title or duration in the Audio block, you can Publish correction (see “Versions and corrections”).
- If you click Cancel after Generate, the audio has still been created and has used AI credit. It is in the media library if Save in the media library was on.
If it does not work
| Message | What it means |
|---|---|
| Upload failed. | The file was not saved. Try again. |
| Microphone access denied or unavailable. | The browser did not allow access, or there is no microphone. Allow access in the browser settings. |
| Recording could not be saved. | The recording was not uploaded. Try again. |
| Please enter text for speech. | The field Script is empty. |
| Speech could not be created. | The audio was not created, for example because of an error or because a daily limit of AI use is reached. Try again later. |
| The script could not be created. Please try again. | The script was not written. Possible reasons are a lesson without text or used-up AI credit. |
| Voice preview failed. | The voice sample could not be loaded. |
| This workspace has used up its AI credit for this month. | There is no AI credit left for this month. |
| This workspace has used up its AI credit for the contract year. | There is no AI credit left for the contract year. |
| No valid AI credit is currently set up for this workspace. | The workspace has no valid AI credit. |
| Media library could not be loaded. | The list of audio files could not be loaded. Reload tries again. |
| This audio file is no longer available. | The file behind this entry can no longer be loaded. Choose another one or upload it again. |
| Another person has changed this course in the meantime, so your latest change was not saved. Copy any text you want to keep before you load the current version. | Someone changed the course in the meantime. Load the current version and add the audio again. |
The three messages about AI credit appear for Generate and Preview voice. For the script, “The script could not be created. Please try again.” appears instead.
Checked on 6 November 2026 against the current Fracto release.