
Insert, crop and resize images
How to insert an image into a lesson in Studio, describe it and set variant, width, height and crop, without changing the original.
An image is a block of the lesson. You choose it from the media library, upload it or have it created, describe it and set how large it appears and which crop it shows. The original image stays unchanged.
Before you start
- You need the Hub task Create courses. It also covers uploading and creating images. Only its owner edits a private course.
- Fracto accepts image files up to 100 MB, for example PNG, JPEG, WebP, GIF or SVG, and does not convert them. The image appears at the resolution you upload it in.
How to insert an image
-
In the Block library, under Images, insert a block: Centered image, Full-width image, Banner or Text on image. Inserting blocks is described in “Edit a lesson with blocks”.
-
Select the block and click Edit. Click Choose image from media library. The Course media window opens, first with the Media library. At the top you switch the source: AI images, Upload, Media library, Unsplash, Knowledge base or Device illustration.
- Media library: Choose an existing image. You can search (Search media library), filter (Type or source with All media, Uploads and AI images) and limit the list to the images of this course with the switch This course. On the left you choose a folder, Entire library or Unfiled.
- Upload: Click Choose file, check the preview and click Use this image. The image stays saved in the course media.
- Unsplash: You search for a photo. Under the image Fracto shows the name of the photographer with a link and the note about Unsplash.
- AI images creates an image from your description. Device illustration turns an existing image (from the knowledge base, the media library or an upload) into an illustration, optionally with a template. Created images are saved in the course media. Knowledge base shows images from the documents you added to the knowledge base.
-
The window closes and the image is in the block. If you replace an image, the alt text and caption stay if they are already filled in. If they are empty, Fracto takes the alt text and caption of the chosen media library entry.
-
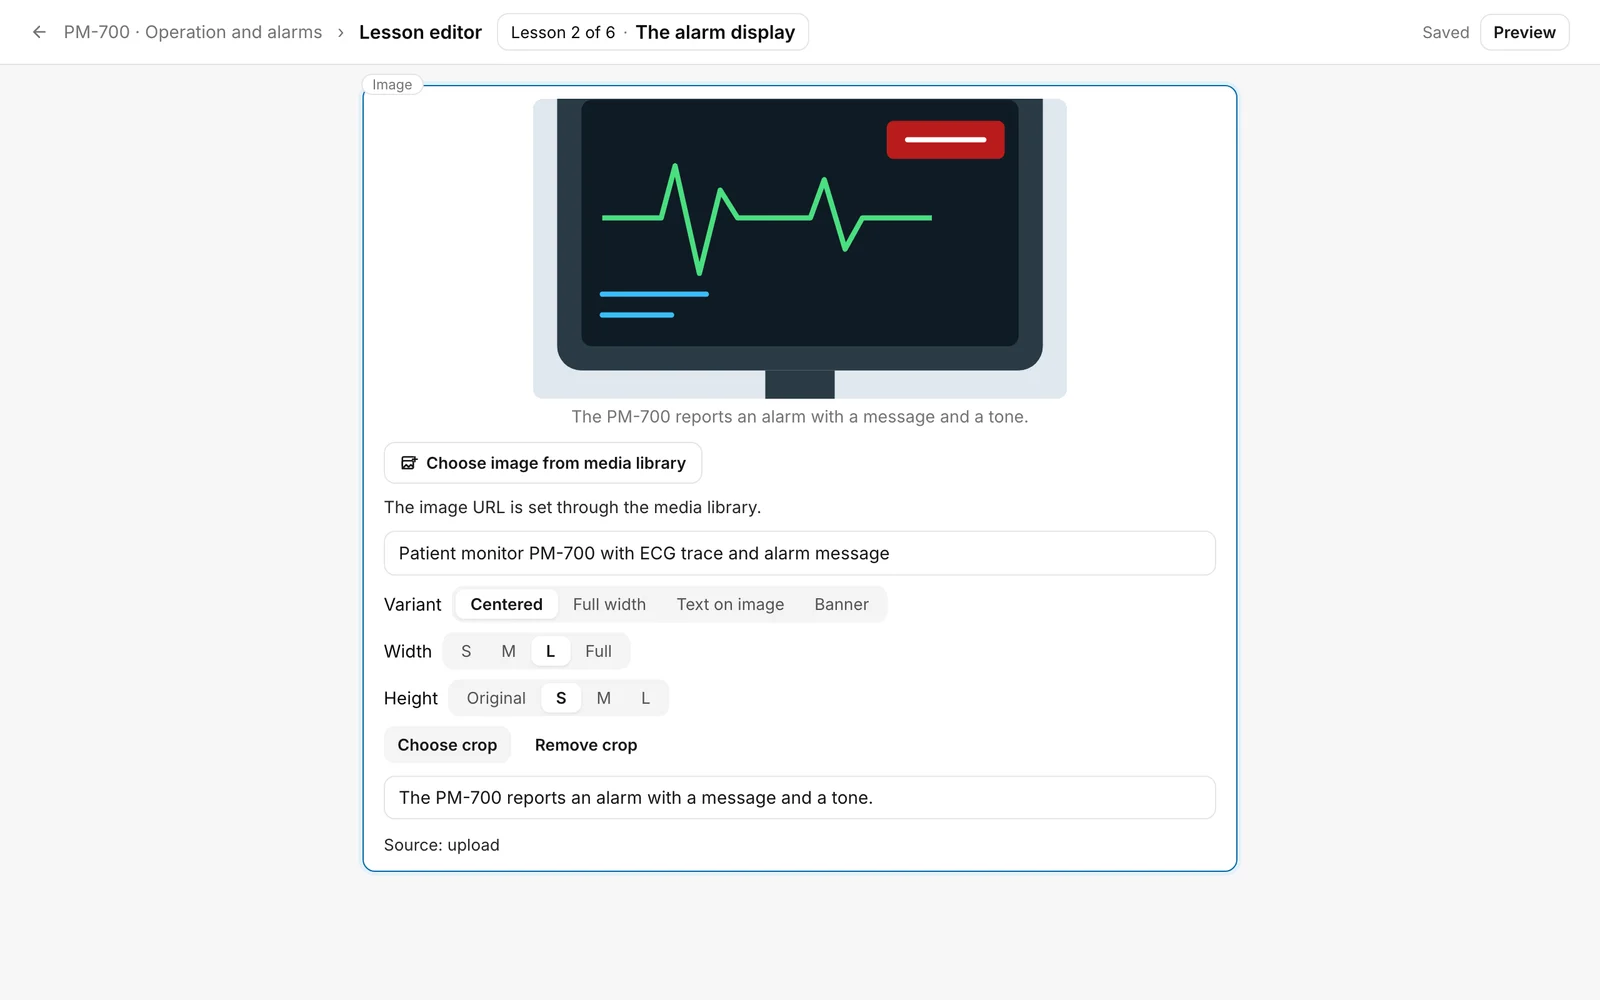
Describe the image in the field Alt text (optional). Screen readers read this text aloud. If it is missing, “Alt text missing” appears above the block. Under the image you can add a Caption (optional).
-
Choose the Variant: Centered, Full width, Text on image (with a heading and text on the image) or Banner (a flat header image). The next steps exist only for Centered and Full width, and only once an image is chosen.
-
Set the Width: S, M, L or Full. These are at most 480, 620 and 760 pixels, and with Full the width of the course frame. L is preset. It is the same setting as under Style and layout. With Centered an image never gets wider than 760 pixels, not even with Full.
-
Set the Height: Original, S, M or L. These are at most 240, 360 and 480 pixels. The image is scaled down, not cut off. With Full width and no choice, Fracto shows at most 560 pixels of height. A taller image is then cut off at the edge.
-
Click Choose crop if only part of the image should appear. In the window Choose image crop you move the image, set the Zoom and choose the Format: Original,
16:9,4:3or1:1. Save crop applies it, Cancel discards it.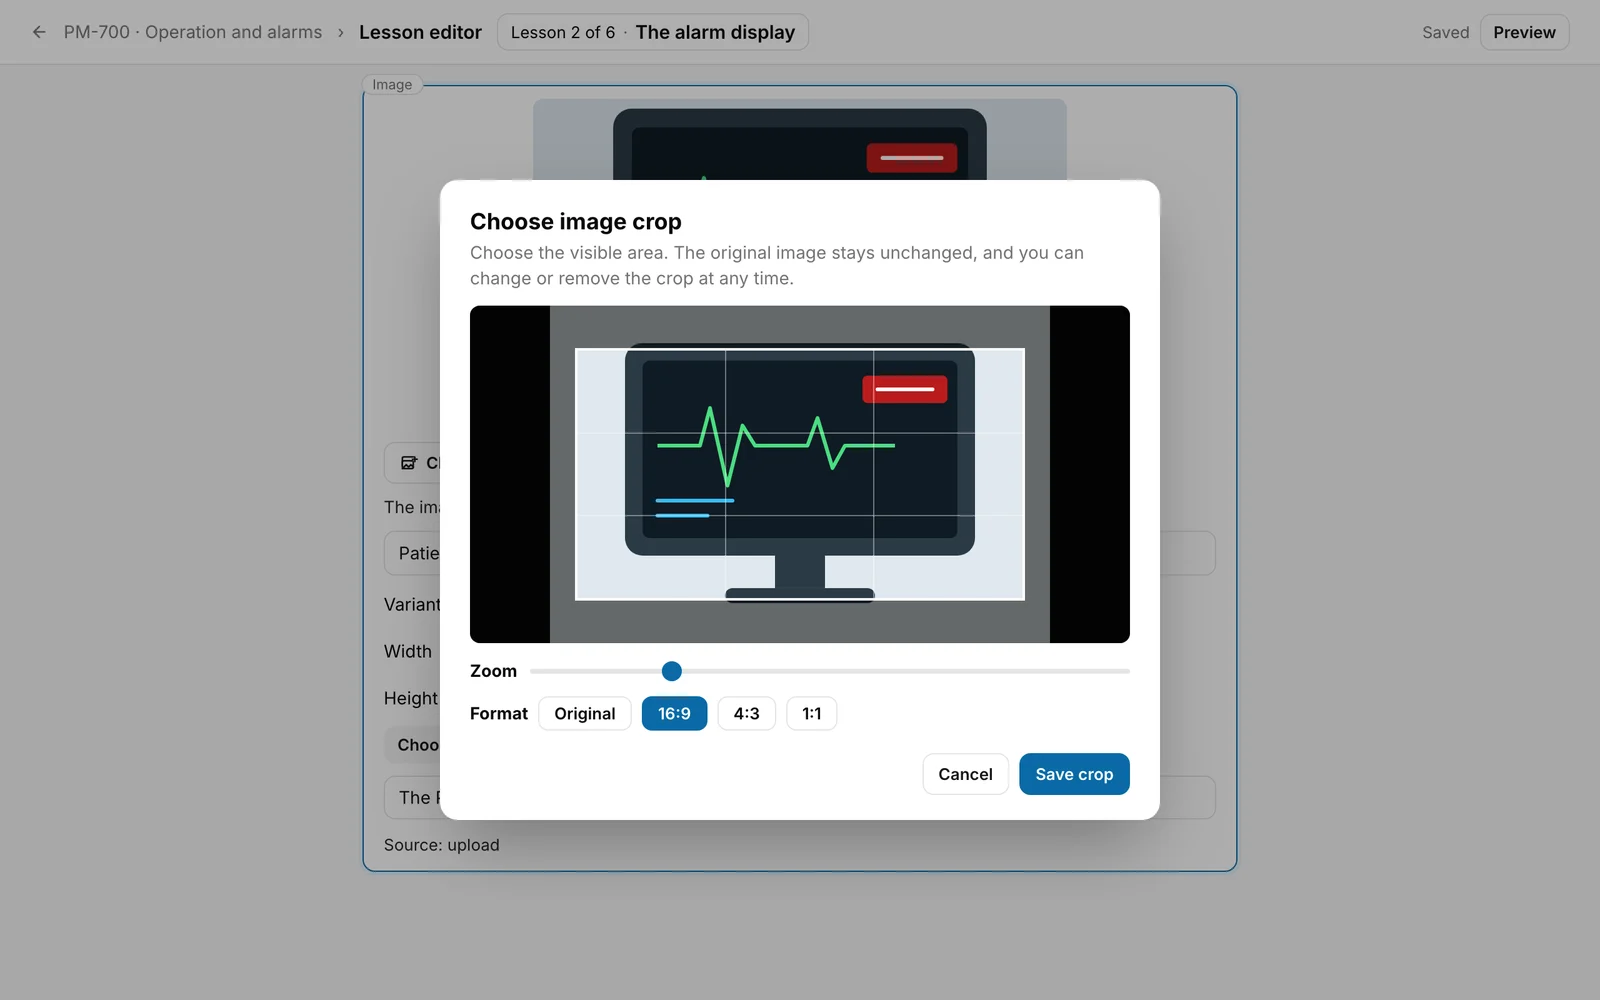
-
Remove crop shows the whole image again. The button only exists while a crop is set. A crop belongs to the chosen image only. If you choose another image, it is dropped.
You know it worked when the image shows in the chosen size and crop, the warning “Alt text missing” is gone and the editor shows Saved at the top.
What happens afterwards
- The editor saves by itself. Learners see the change once the course is published.
- Before publishing, the Publication check looks at your images. It points out “Image without a screen reader description”, “Image is too small for its width and looks blurry” and “Demo image or missing image”. These are suggestions. You can publish anyway. For an image that is too small, Fix chooses the largest width at which the image stays sharp and sets Full width and Banner to Centered. More under “Publish a course”.
- If you insert an image block anew into a course that was published before, that needs a new version. If you change the image, alt text, caption, width, height or crop in an existing block, and change nothing else, you can Publish correction (see “Versions and corrections”).
- If you remove an image from the media library, images that are already in blocks and in published versions are kept.
If it does not work
| Message | What it means |
|---|---|
| This file is not a supported image. Please select an image file. | The file is not an image. Choose an image file. |
| Upload failed | The image was not uploaded or not applied. Try again. |
| This image is no longer available. | The file behind this entry can no longer be loaded. Choose another image or upload it again. |
| The library could not be updated. Please try again. | An action in the media library did not work, for example renaming or moving. Try again. |
| Alt text missing | This is a hint, not an error. Enter a description under Alt text (optional). |
Checked on 6 November 2026 against the current Fracto release.